
All about Camp Snap filters and how to make them
What’s a Camp Snap filter? Why might you want to use one? And how can you make your own?
March 24, 2025
Introduction
The latest Camp Snap 103b camera allows you to more easily change filters, meaning you can change how your images look, without doing any post-processing. Almost like shooting on a different film stock when using a disposable camera. This is a really cool feature and allows you to enjoy the same Camp Snap screen-less work-flow we all know and love, but whilst getting some really nice effects straight out of the camera.
What are Camp Snap filters?
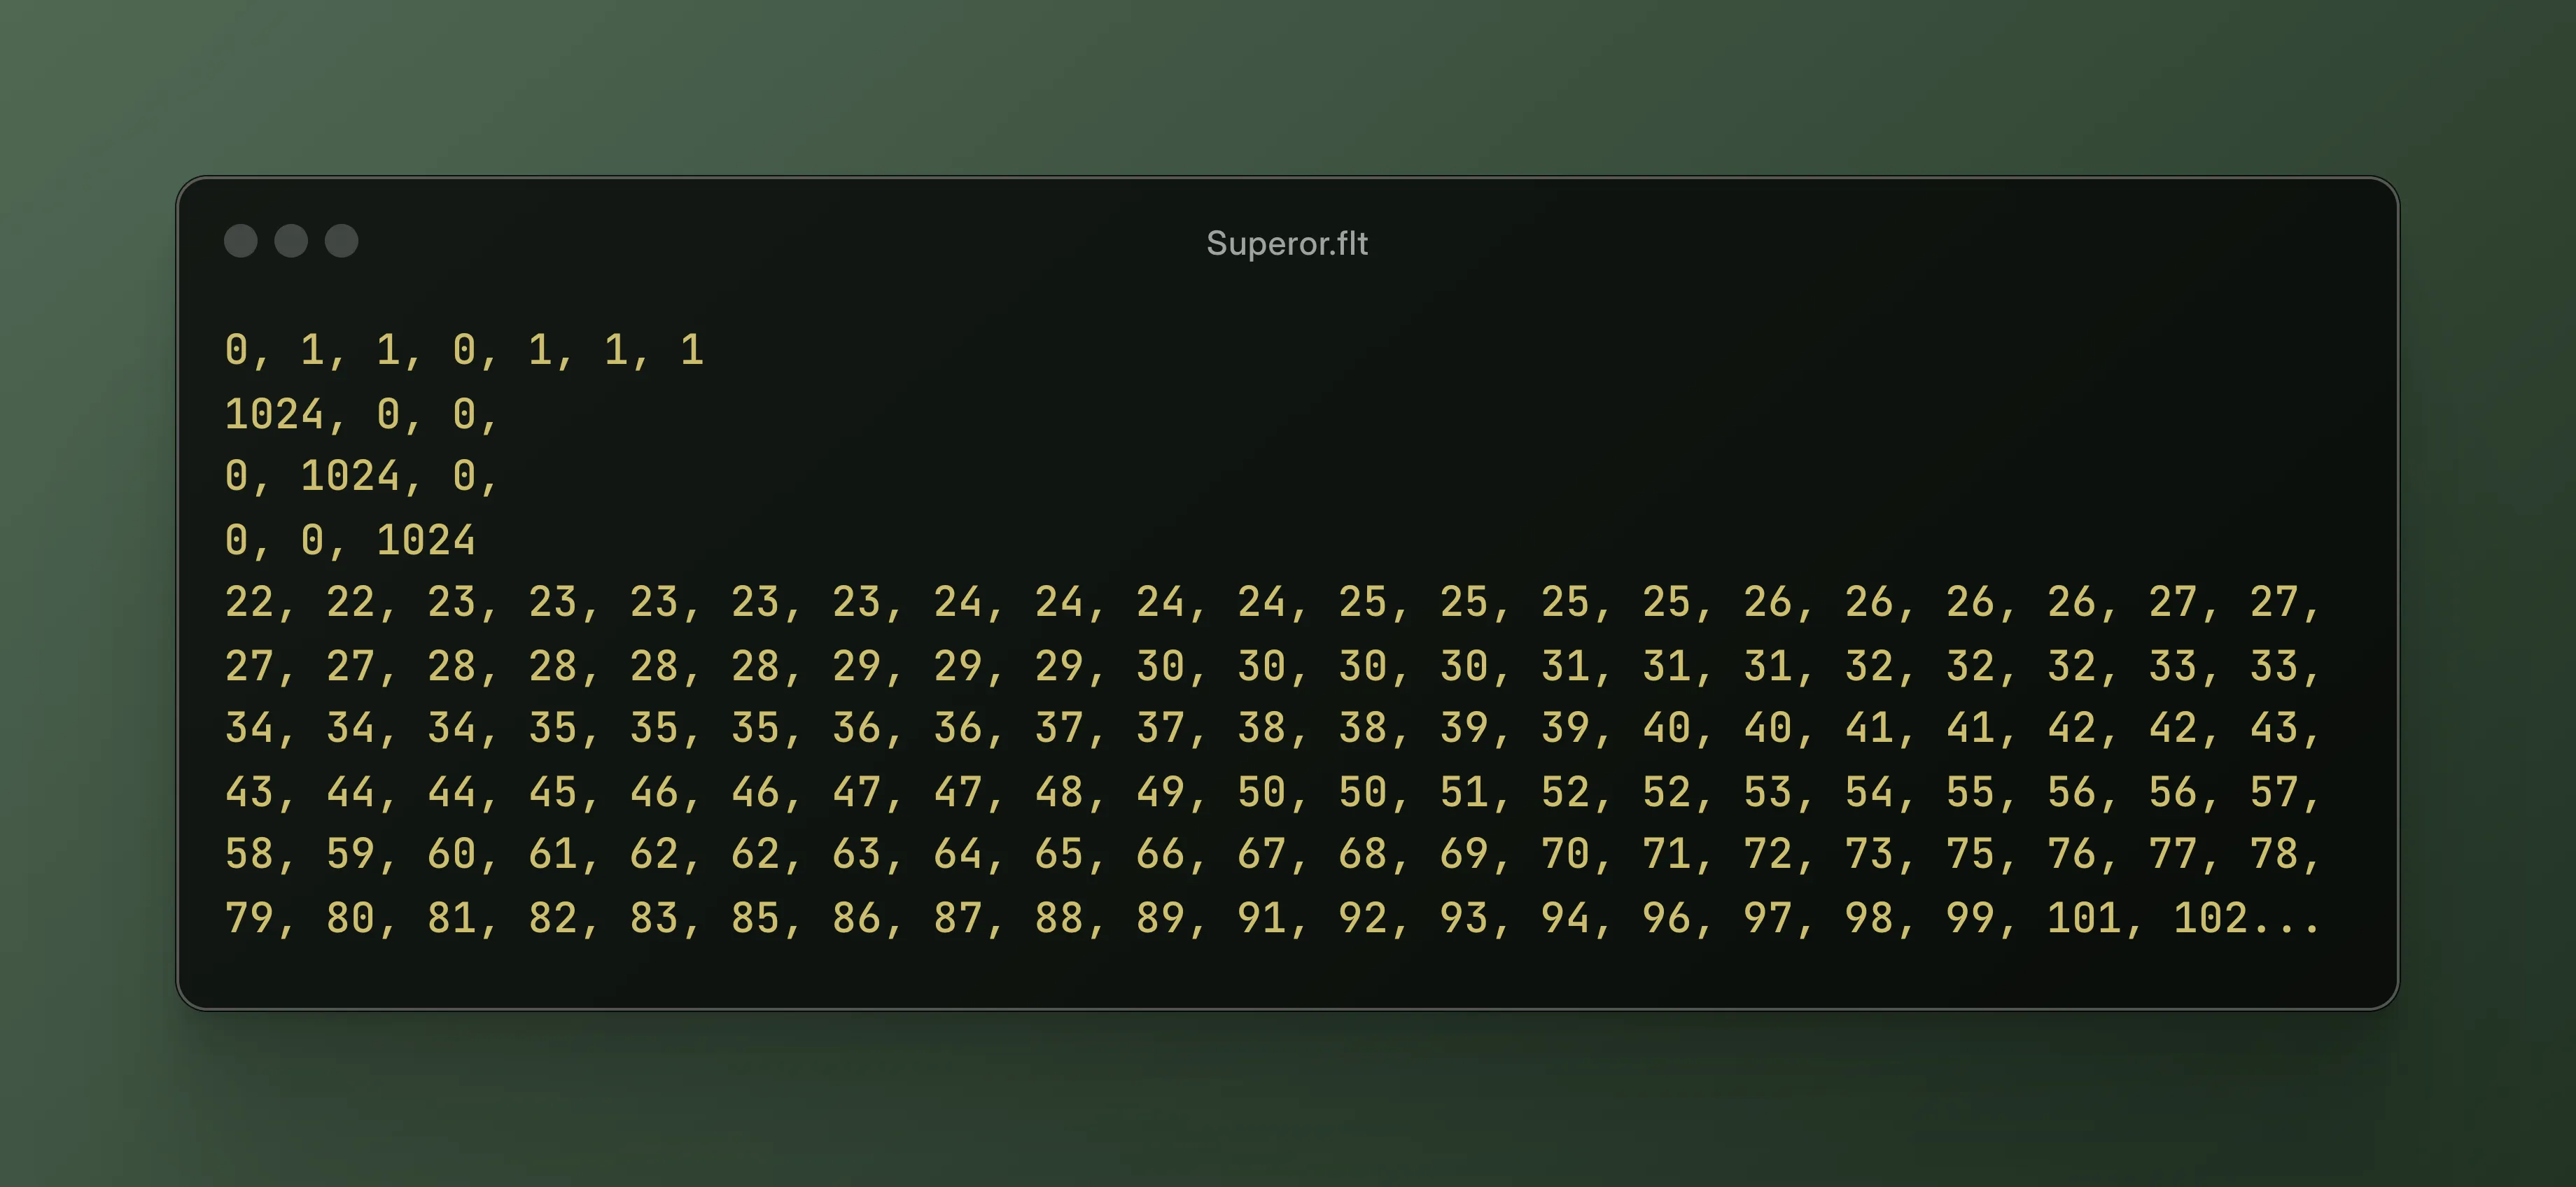
Camp Snap filters are simply just configuration files that tell the camera firmware how to process the image. They are just a text file with the .flt extension, containing a specific format of values. The camera firmware reads this file when you turn it on and then applies the transformation settings to your images as you take them.
Pre-made filters
If you want to try filters without getting your hands dirty theres plenty of options. Camp Snap official have a small selection of really nice filters to try. Theres our very own Camp Shades filters. Then there's Campersnapper who also have a nice selection over on their site to try. If you are just starting on your adventure into filters, then I would suggest trying out a few of these and see what you like. You might find what you are looking for, but you will definitely start to learn what you like and what you don't.
Making your own filter
If you can’t find what you want, and you want to have a go at making your own then keep reading because we're going to explain exactly how to do that now.
Using the Camp Snap filter tool
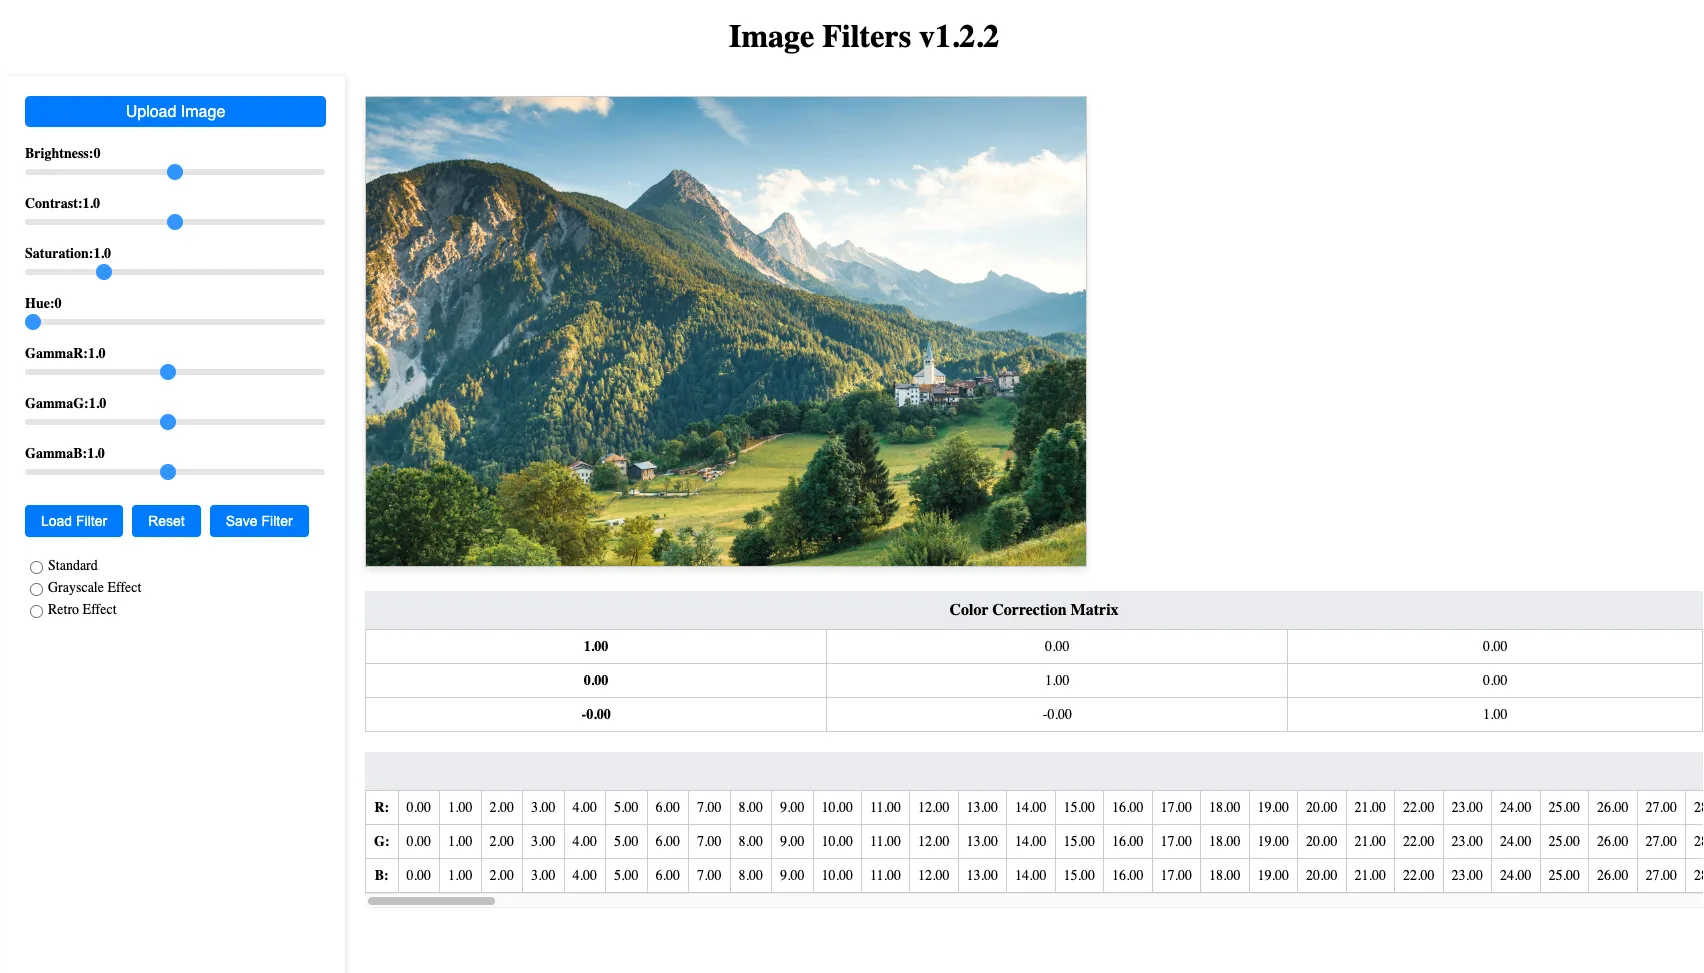
The simplest way to get started is to use Camp Snap's filter making tool, which offers a great UI of sliders and inputs to change the different parameters, and has a handy preview image to see what your filter might look like. You can even upload your own image to test your filter on. TIP: Make sure you use a Camp Snap image to preview, otherwise you won’t get a very accurate representation of the effect you might get.
Creating a bespoke filter
For a lot of situations the Camp Snap tool will get you what you want, but if you want some more precise control over colours and contrast then you will need to make a custom filter. For this you will need a photo editing app (Photoshop, Affinity work great but you could use anything that allows you to edit a file and export), a few sample Camp Snap images to test with, a tool to convert your adjustments to filter file and some time.
A couple of notes: Whilst this method does give you a lot more control, there are still some things that we can't change. We cant change the grain, sharpness, and individual colours or hues. Hopefully in the next firmware update we might get access to some of these controls but for now we have these limitations. Still, we can do a lot with this alone.
Creating the look
First of all, open up a Camp Snap image in your favourite image editor, and make the adjustments you would like to apply to your image. You could theoretically do this with any image, but since we are making it for the Camp Snap, it makes sense to use an image taken on one.
Make sure you make any adjustments as layers, as you will need them to copy over to your swatch later. You can change brightness, contrast and introduce colour shifts.
Initial testing
I usually then open up several other images with different subject matter and lighting conditions and copy the adjustments onto them to see how it works under differing conditions. Often I find I need to go back and change my settings a bit to make it work more reliably across multiple conditions. This takes a bit of trial and error, but is well worth the extra effort to get a final filter that is more predictable.
Preparing to make the filter
Once you have made the adjustments you want to your image and you are happy with how it looks. Head over to Campersnapper and download the ramp image. Open it in your editor and copy your adjustment layers onto it. Flatten your image and then export as a PNG at the exact same size. This is important, if its not the same dimensions it won't work.
Converting your ramp into a filter
One you have your ramp with your adjustments saved on it, you need to convert it to the .flt filter format that is required by the Camp Snap camera. If you head back over to Campersnapper, you can upload your ramp file and then save it to your computer as an flt.
Testing your filter
Once you have created your .flt file. You need to transfer it onto your camera to try it out. Connect your camera to your computer/device with a USB cable. Open up the 'CAMPSNAP' device in a file browser, and remove any .flt file that is already in there. Then copy your filter file onto the device. Eject your camera, and disconnect from the computer/device. You are now ready to try. When you turn the camera on now, you should see it show 'CUS' for a second or so whilst booting, this means its found and is loading your filter. You are now ready to take some shots with your awesome new filter.
Note: we are in the process of publishing the tool we use to make filters and we will update this post later with instructions on how to use it.